Subdomain support
This tutorial was contributed by Deo Kumar
Subdomain setup
-
The first thing as you need to do is create a subdomain , Contact Quintype Support for creating a list of subdomain.
-
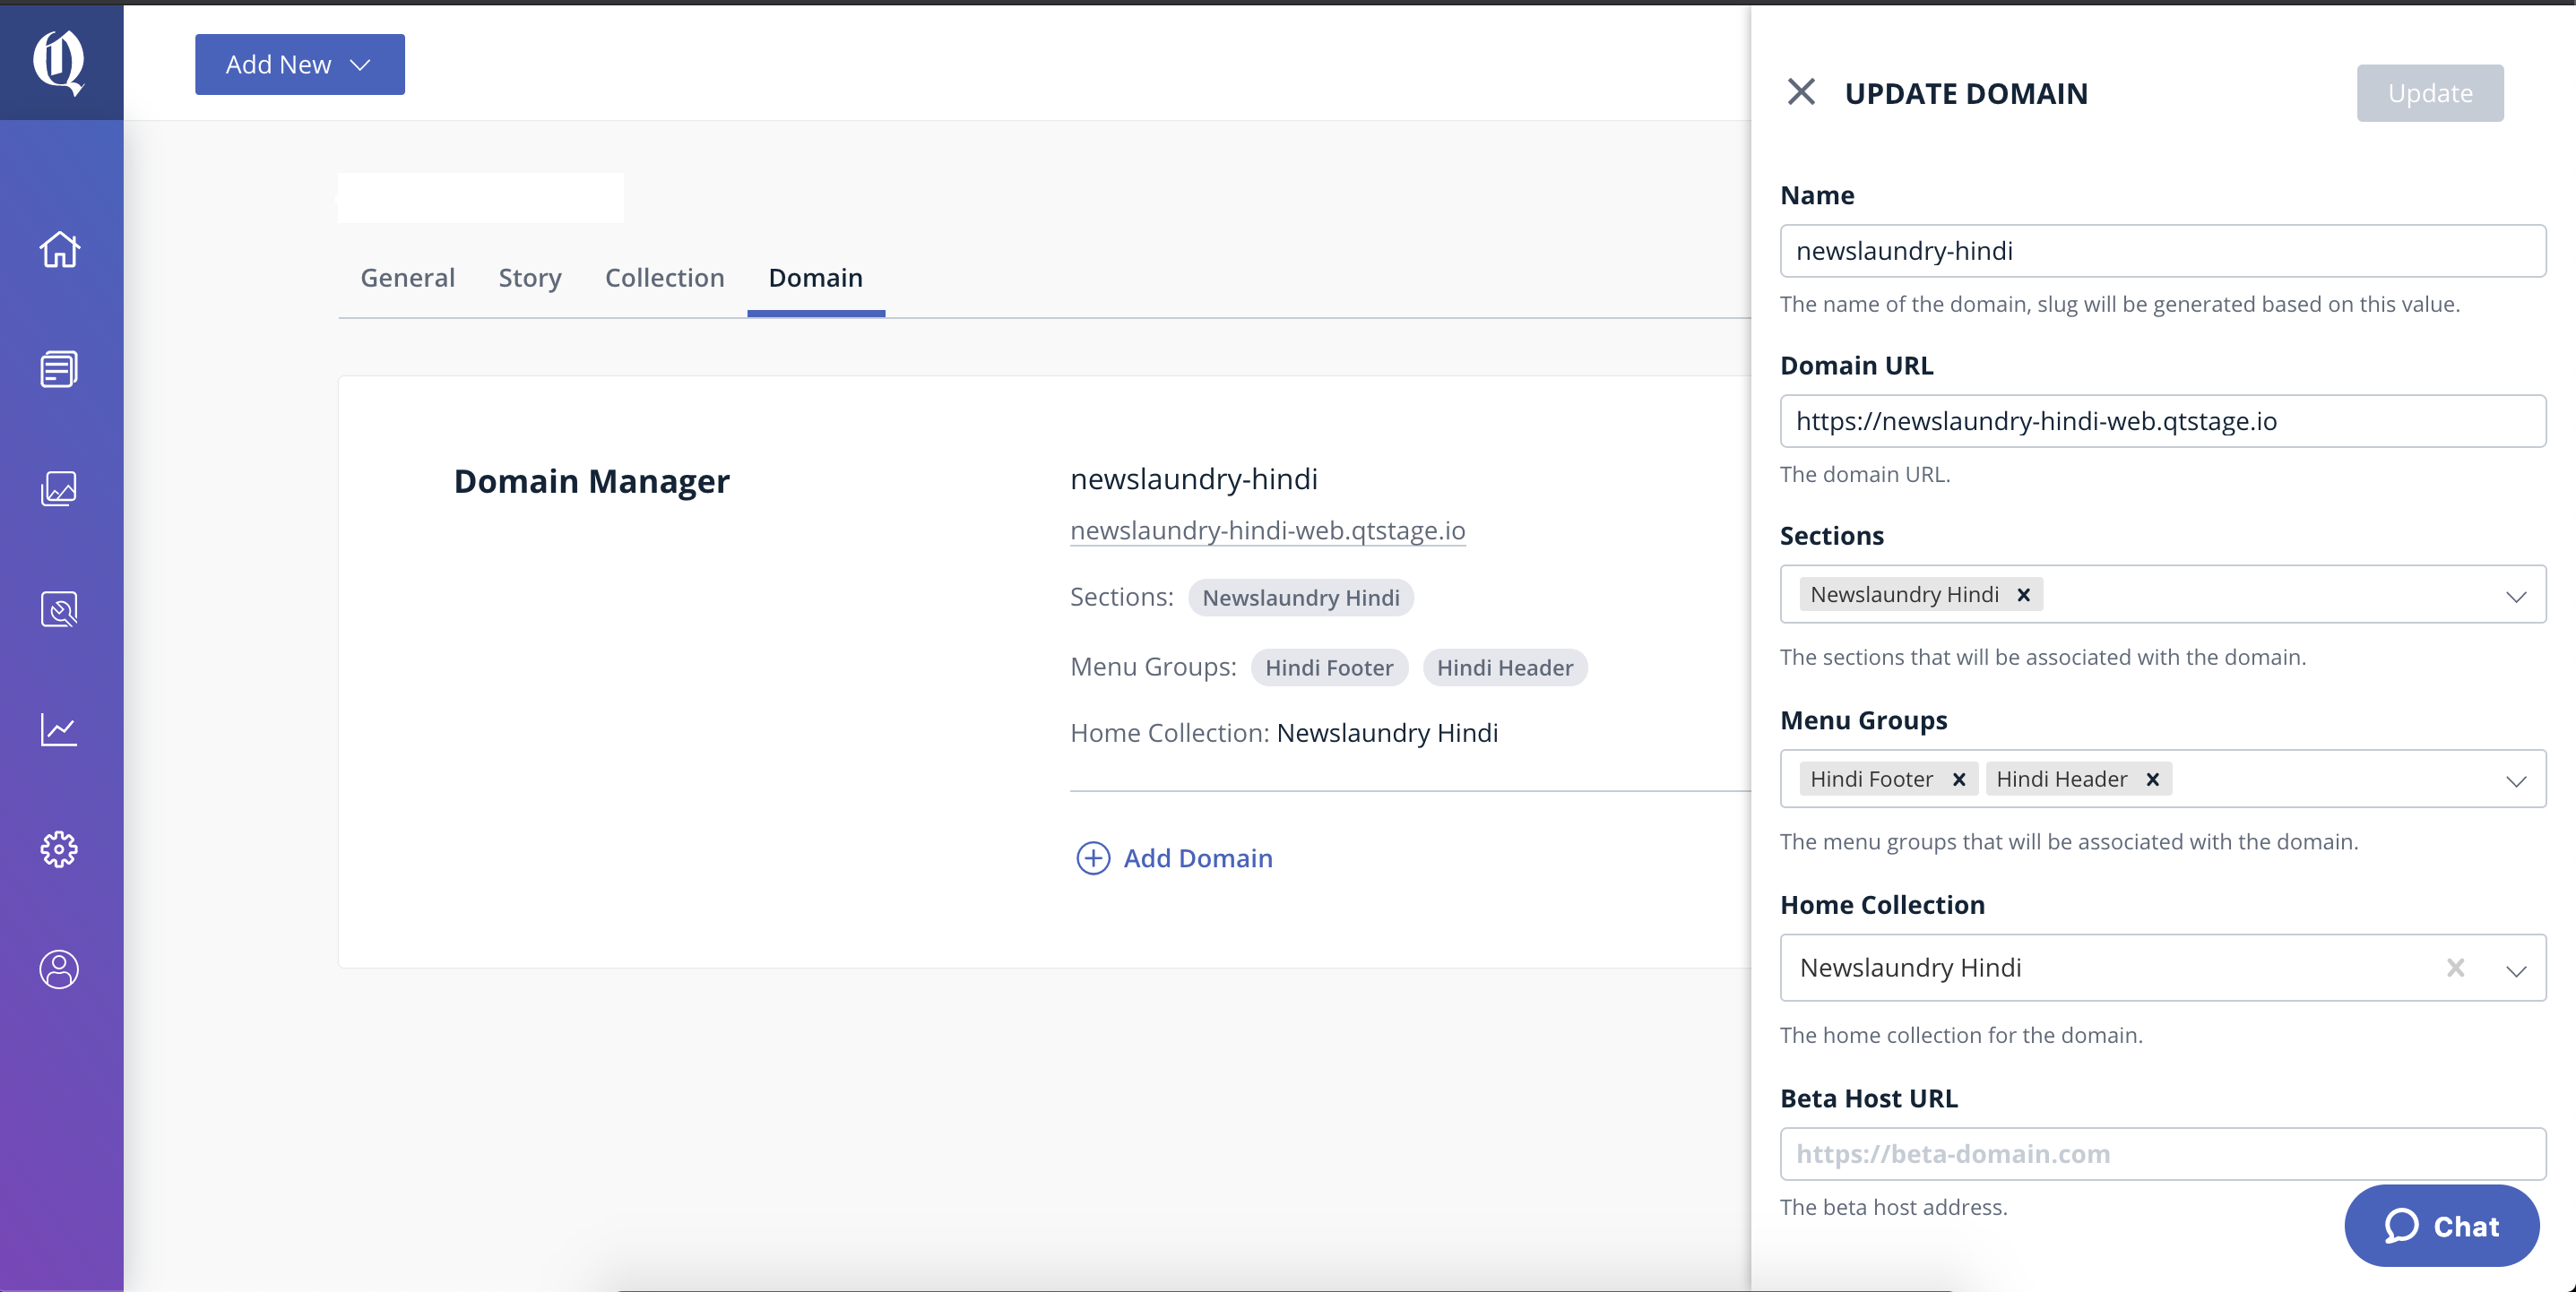
Configure list of subdomains in in Bold and fill all the necessary fields like name, domain url , section mapping, menu group, and home collection, etc. Shown in the below picture. You may contact Quintype Support team to setup if you don’t have access.
-
As soon as you configure the subdomain in Bold, you should able to see the subdomain slug in the config API of sketches. ex - https://ace-web.qtstage.io/api/v1/config
-
Now the last step is to map your subdomains with the app, go to publisher.yml file, and change subdomain with your actual subdomain URL.
In our config/publisher.yml we have a domain_mapping field you need to change it with the actual subdomain name
domain_mapping:
  hindi.lvh.me: ace-hindi
That’s it. Now your subdomain is ready and, you should able to see the subdomain pages.
Render different fonts for subdomains
Another good feature of malibu is that you can use different types of font for different domains.
- Goto load-data.js file and add domainSlug: domainSlug of _loadData() function
Open app/server/load-data.js
return _loadData().then(data => {
    return {
      domainSlug: domainSlug,
      httpStatusCode: data.httpStatusCode || 200,
      pageType: data.pageType || pageType,
      data: Object.assign({}, data, {
        navigationMenu: getNavigationMenuArray(config.layout.menu, config.sections)
      }),
      config: pick(config.asJson(), WHITELIST_CONFIG_KEYS)
    };
  });
- Now goto render-layout.js file and pass domainSlug from the state so that you can access domainSlug into the layout.ejs for font changes.
Open app/server/handlers/render-layout.js
export function renderLayout(res, params) {
  const chunk = params.shell ? null : allChunks[getChunkName(params.pageType)];
  const {gaId} = getConfig(params.store.getState());

  res.render(
    "pages/layout",
    Object.assign(
      {
        assetPath: assetPath,
        content: "",
        cssContent: cssContent,
        fontJsContent: fontJsContent,
        ...
        domainSlug: get(params.store.getState().qt, ["config", "domainSlug"], ""),
        ...
      },
      params
    )
  );
}
- Now the last step is to change your font on basis of domainSlug, for that you need to open the layout.ejs file and add domainSlug check-in head of the page to render different types of font.
Open views/pages/layout.ejs
<head>
  .
  .
  .

<% if(domainSlug === 'ace-hindi') { %>
  <style>
    @font-face {
      font-family: 'Noto Sans';
      font-style: normal;
      font-weight: 400;
      font-display: swap;
      src: local('Noto Sans'), local('NotoSans'), url(https://fonts.gstatic.com/s/notosans/v9/o-0IIpQlx3QUlC5A4PNr5DRASf6M7VBj.woff2) format('woff2');
      unicode-range: U+0900-097F, U+1CD0-1CF6, U+1CF8-1CF9, U+200C-200D, U+20A8, U+20B9, U+25CC, U+A830-A839, U+A8E0-A8FB;
    }
    </style>
<% } else { %>
// default
  <style>
    @font-face {
      font-family:"proxima-nova";
      src:url("https://use.typekit.net/af/949f99/00000000000000003b9b3068/27/l?primer=7cdcb44be4a7db8877ffa5c0007b8dd865b3bbc383831fe2ea177f62257a9191&fvd=n7&v=3") format("woff2"),url("https://use.typekit.net/af/949f99/00000000000000003b9b3068/27/d?primer=7cdcb44be4a7db8877ffa5c0007b8dd865b3bbc383831fe2ea177f62257a9191&fvd=n7&v=3") format("woff"),url("https://use.typekit.net/af/949f99/00000000000000003b9b3068/27/a?primer=7cdcb44be4a7db8877ffa5c0007b8dd865b3bbc383831fe2ea177f62257a9191&fvd=n7&v=3") format("opentype");
      font-display:auto;font-style:normal;font-weight:700;
      }
  </style>
<% } %>
  .
  .
  .
</head>