Getting Started with Malibu
This tutorial was contributed by Tejas Dinkar, Ramsharan Gorur Jayaraman and Shraddha Kesari
Welcome to Quintype :-).
In this post we will cover how to get started, building a Quintype publisher app with React, Node, and the Malibu framework.
Prerequisites
Before starting, please ensure the following is installed on your development machine:
- Node LTS (10.15 at the time of writing), and npm
- Either Supervisor or Docker for running the development server
- git or the GitHub App
It is also strongly recommended that you have a working knowledge of the following before you get started
- How to use React to build a front end application
- ES6 functionality, including concepts like promises and async/await
- Git and Version Control
In many of these examples, we will be using VS Code for development. It’s fine if you use another editor, but some of the keyboard shortcuts and IntelliSense may not work.
Creating a new Malibu app
-
You can create a new malibu app using this npm package.
-
You can create a git repository in any tool you like or you can ask the Quintype team to set up this repository under the Quintype organization (by emailing support@quintype.com). If you plan to use docker on windows, then please ensure that the git repository has been cloned within your user’s home directory.
Running the app locally
Please ensure all prerequisites have been installed, before proceeding with instructions for your specific operating system.
Instructions for Mac OSX / Linux
Open a terminal, and change the directory to the newly cloned repository.
$ cd path/to/new/repository
Executing the run script will start the development server. This will take a few minutes the first time while it downloads modules from npm.
$ ./run
...
Example app listening on port 3000!
Example app listening on port 3000!
Example app listening on port 3000!
Example app listening on port 3000!
Instructions for Windows
Open the project in the file finder, you will find two files.
run-assets.bat. Click on this to run the assets server and rerun this whenever a new asset is added.run-backend-server.bat. Click on this to run the backend server and rerun this whenever a change is made.
Running without Supervisor
In case you would like to run this without a supervisor, you may start the asset server in one terminal, then the node server in another terminal.
In a terminal, run
$ cd path/to/app
$ npm install
$ npm run asset-server
And in another terminal, run
$ cd path/to/app
$ npm run dev-server
Instructions for Docker (any OS)
Open a terminal, and change the directory to the newly cloned repository.
$ cd path/to/new/repository
Starting docker-compose will start the dev server. This will take a few minutes the first time while it downloads modules from npm.
$ ./dev-docker/start
...
web_1     | Example app listening on port 3000!
web_1     | Example app listening on port 3000!
web_1     | Example app listening on port 3000!
web_1     | Example app listening on port 3000!
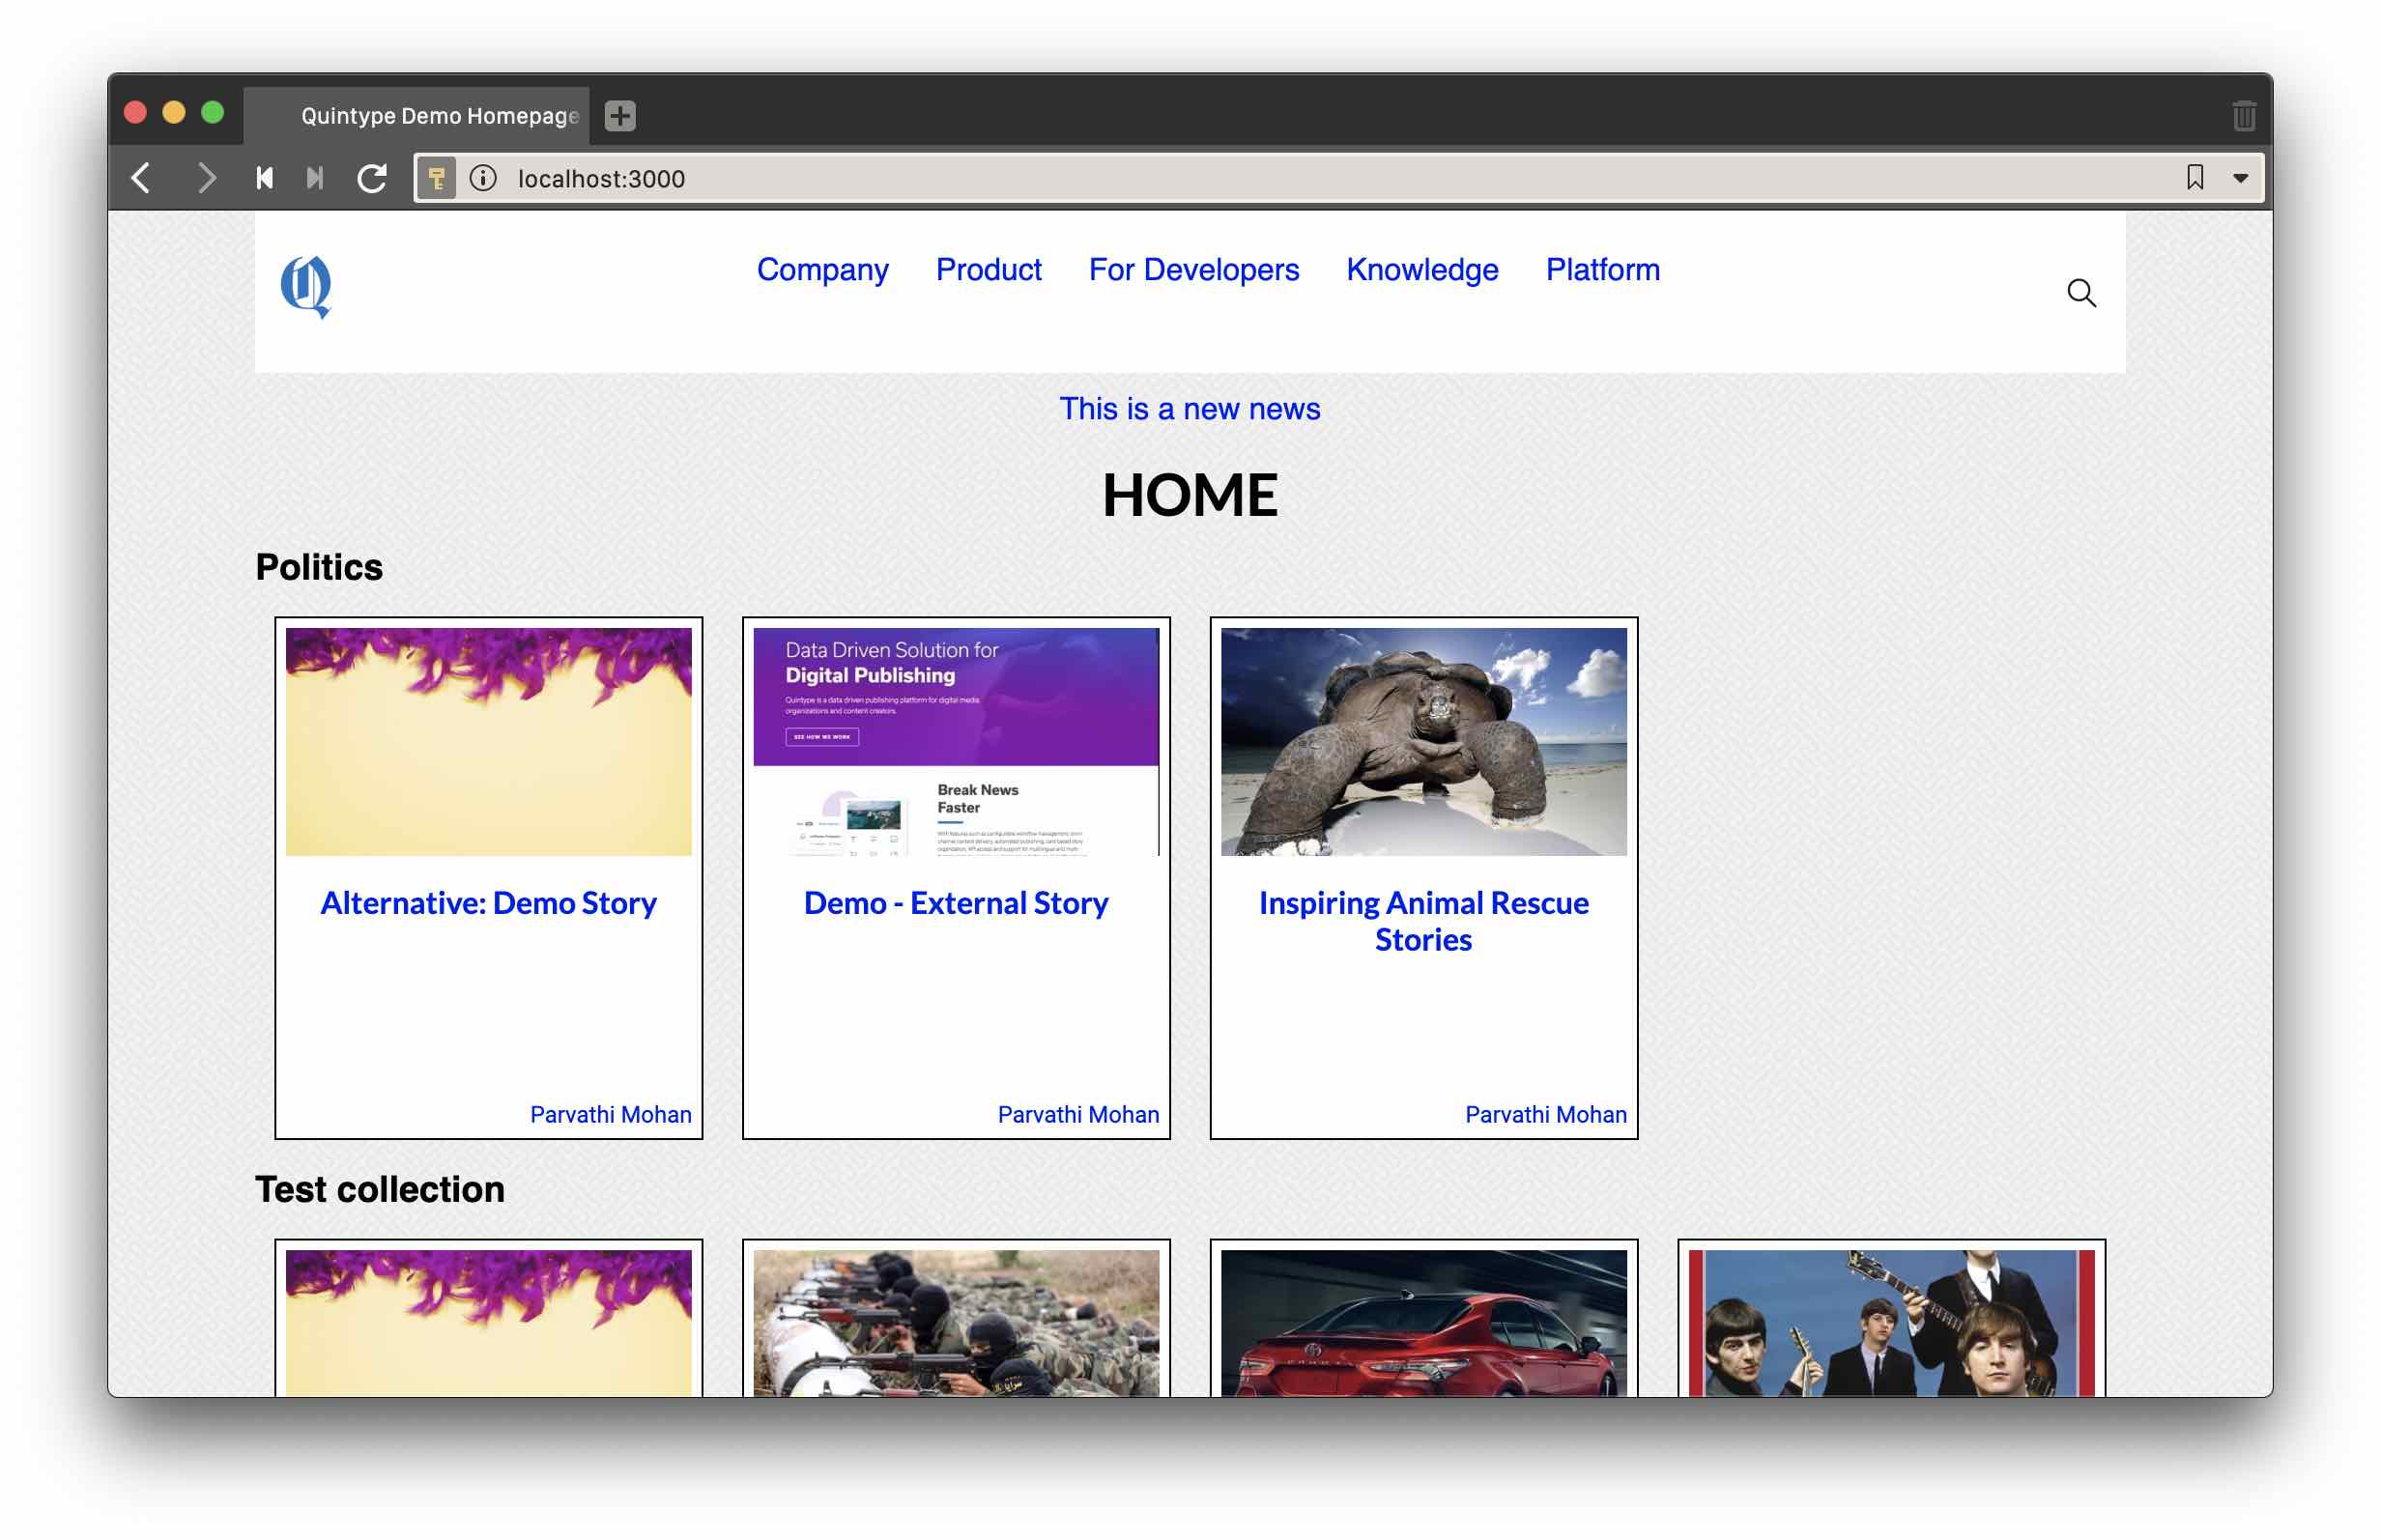
Checking that things work in the browser
Open a browser, and navigate over to http://localhost:3000. You should see something that looks like the following:
Checking that hot reloading works
Keep your development server and browser running, and use your editor to open app/isomorphic/components/header/nav-bar/index.js.
Find the line that looks like this
<ul styleName="navbar">
for the above styleName provides a background-color
.navbar{
  background-color: blue;
}
Hit save, then come back to the browser. The navbar should immediately change to a blue background, and look like this:
Switching to a different API endpoint
By default, Malibu points to https://quintype-demo.quintype.io as its API endpoint. In order to change this, edit config/publisher.yml, and update the sketches_host to https://<your-name>.quintype.io.
Pushing to a staging environment
Please see Chapter 3 - Deploying With Black Knight to understand how to push these changes to a staging environment. However, you may also proceed with the tutorial and do this step later.
Wrapping Up
Hooray, you now have a running instance of a simple Quintype publisher!
You may now proceed to Creating a Page or jump to a recipe from the Tutorial.